Dave's Astra G with Car PC

Dave One

Regular Member
Eibach pro-kit springs and Bilstein B4 shocks
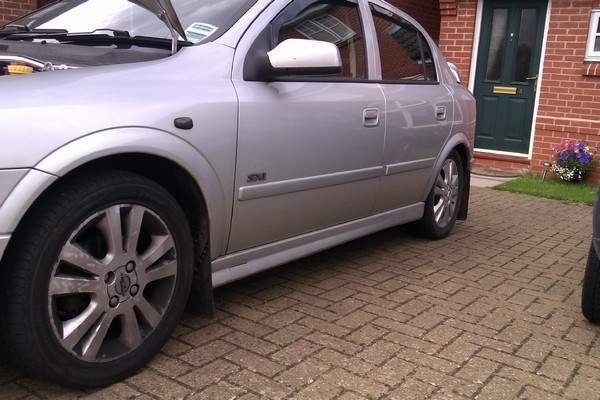
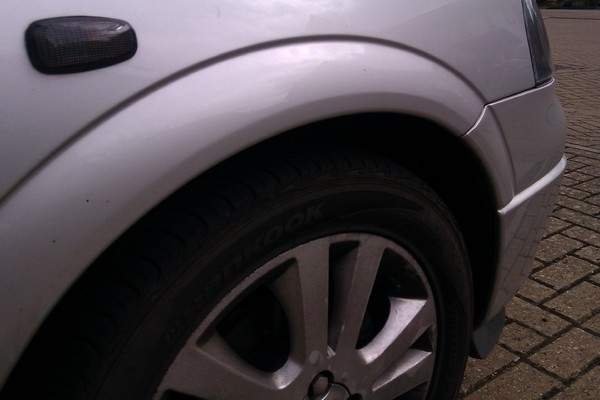
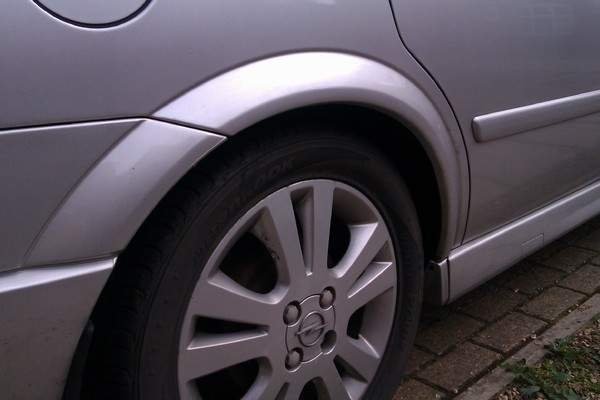
After weeks of deliberation (and saving) I decided to go for 'shocks and springs' over 'coilovers'. I got a Eibach pro-kit springs with 40mm drop from Astra_BLK (thanks Ben) with very little wear and Bilstein B4 shocks from LMF. I was recommended to replace the top mounts and drop links (thanks Ian - bigphilbaby). A forum member I've used to service my car for the last three years (Jason - jason1) put aside some of his valuable time to do the work for a small fee - thanks bud.
I didn't get any pics during but here's some pics of the end result, remembering the car needs time to settle yet .....:)
aimg585.imageshack.us_img585_3592_imag0022aoc.jpg

aimg716.imageshack.us_img716_9648_imag0023aoc.jpg

aimg829.imageshack.us_img829_4324_imag0024aoc.jpg

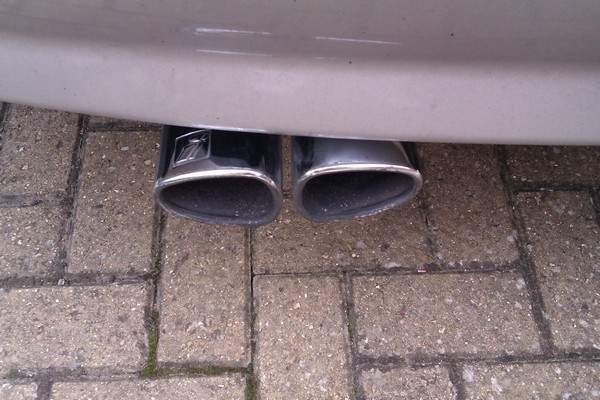
Irmscher DD exhaust fitted
Jason also fitted my Irmscher DD exhaust. Unfortunately, it's sitting slightly off level at the moment but I'm hoping to get it levelled when at the 'tyre and exhaust' for a new pair of tyres and tracking on friday. I think it probably due to an aftermarket centre section and hope the bracket can be manipulated.
aimg189.imageshack.us_img189_8374_imag0020aoc.jpg

It needs a clean too.........
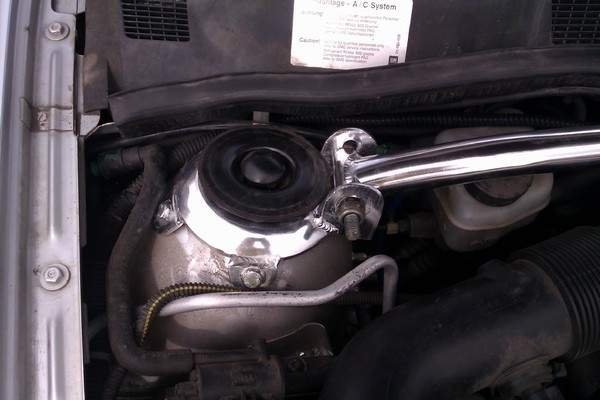
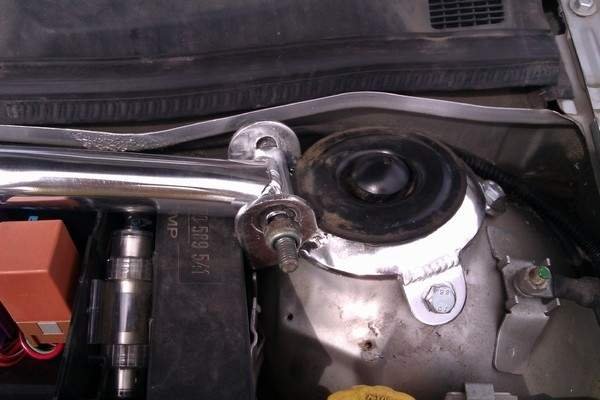
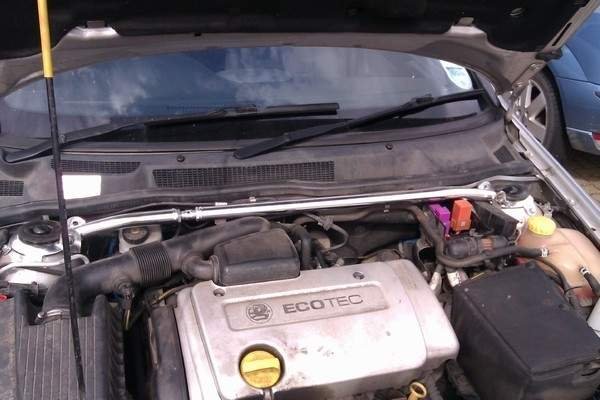
aimg840.imageshack.us_img840_2545_imag0021aoc.jpg

Strut brace fitted
I also got a JOM strut brace fitted whilst the shocks and spring were being replaced. I had to move the fuse box forward and have no relay box cover until I get my dremel out later........
aimg823.imageshack.us_img823_6853_imag0025aoc.jpg

imag0026aoc.jpg

imag0027aoc.jpg

The handling has really improved (thats not surprising), but I'm unable to say how much the improvement is down to the 'shocks and springs', and how much is down to the strut brace.
I've got a few more bits lined up for this week and update as soon as I can :).
 

Attachments

  • aimg109.imageshack.us_img109_7928_imag0027aoc.jpg
    aimg109.imageshack.us_img109_7928_imag0027aoc.jpg
    25.9 KB · Views: 259
  • aimg109.imageshack.us_img109_4062_imag0026aoc.jpg
    aimg109.imageshack.us_img109_4062_imag0026aoc.jpg
    28 KB · Views: 253
  • aimg823.imageshack.us_img823_6853_imag0025aoc.jpg
    aimg823.imageshack.us_img823_6853_imag0025aoc.jpg
    33.5 KB · Views: 250
  • aimg840.imageshack.us_img840_2545_imag0021aoc.jpg
    aimg840.imageshack.us_img840_2545_imag0021aoc.jpg
    35.5 KB · Views: 246
  • aimg189.imageshack.us_img189_8374_imag0020aoc.jpg
    aimg189.imageshack.us_img189_8374_imag0020aoc.jpg
    26.8 KB · Views: 254
  • aimg829.imageshack.us_img829_4324_imag0024aoc.jpg
    aimg829.imageshack.us_img829_4324_imag0024aoc.jpg
    36.7 KB · Views: 260
  • aimg716.imageshack.us_img716_9648_imag0023aoc.jpg
    aimg716.imageshack.us_img716_9648_imag0023aoc.jpg
    18.1 KB · Views: 232
  • aimg585.imageshack.us_img585_3592_imag0022aoc.jpg
    aimg585.imageshack.us_img585_3592_imag0022aoc.jpg
    20.5 KB · Views: 243

Dave One

Regular Member
Irmscher front splitter fitted
My original plan for the front splitter upgrade was to fit brake air ducts and an Astra Coupe Turbo (ACT) splitter. However, after completing the colour code upgrade to the sides of the car I decided to remove the remaining dark grey trim and the obvious option became an Irmscher front splitter.
After a post in the wanted section that lead to a couple of offers of splitters that needed rubbing, priming and spraying - I found one for a very reasonable price (thanks b1988m) which I picked up the other weekend on my commute across the country.
I had to go a little way back to get the 'before' shot......
aimg3.imageshack.us_img3_1362_p1020349aoc.jpg

And here are a few of the 'after' shots :)....
aimg64.imageshack.us_img64_8203_imag0032aoc.jpg

aimg580.imageshack.us_img580_79_imag0033aoc.jpg

aimg23.imageshack.us_img23_6611_imag0034aoc.jpg

aimg405.imageshack.us_img405_1323_imag0035aoc.jpg

Headlamp washer jets update
I also took the opportunity to colour code the headlamp washer jets but I'm not happy with their fitment to the front bumper. After these pics I got the dremel out but still need to do some more to flush them properly. I'll get there in the end...........
aimg153.imageshack.us_img153_9680_imag0036aoc.jpg

aimg850.imageshack.us_img850_5451_imag0037aoc.jpg
 

Attachments

  • aimg405.imageshack.us_img405_1323_imag0035aoc.jpg
    aimg405.imageshack.us_img405_1323_imag0035aoc.jpg
    59.6 KB · Views: 227
  • aimg23.imageshack.us_img23_6611_imag0034aoc.jpg
    aimg23.imageshack.us_img23_6611_imag0034aoc.jpg
    65.8 KB · Views: 237
  • aimg3.imageshack.us_img3_1362_p1020349aoc.jpg
    aimg3.imageshack.us_img3_1362_p1020349aoc.jpg
    31.9 KB · Views: 247
  • aimg64.imageshack.us_img64_8203_imag0032aoc.jpg
    aimg64.imageshack.us_img64_8203_imag0032aoc.jpg
    43.1 KB · Views: 241
  • aimg580.imageshack.us_img580_79_imag0033aoc.jpg
    aimg580.imageshack.us_img580_79_imag0033aoc.jpg
    54.3 KB · Views: 239

Dave One

Regular Member
Armrest fitted

I've been doing a 200 mile commute almost weekly with work since March and decided a bit more comfort is needed, especially when 160 miles is on dual carriageway/motorway. A member was selling one he got from the LMF stand at Santa Pod (Cheers marty2), which turned up in very good condition :).

The fitment was very easy...... (btw I gave the interior a clean after fitment as it had been a while....)

Before....

aimg560.imageshack.us_img560_1940_imag0050aoc1.jpg


Rear ashtray removed and pilot holes drilled....

imag0054aoc.jpg


Trim tape used on the top face of the centre console to avoid unslightly holes when removed....

aimg585.imageshack.us_img585_9125_imag0053aoc.jpg


Ashtray refitted and open, showing the two armrest securing screws....

aimg850.imageshack.us_img850_64_imag0055aoc.jpg


Ashtray closed and no unslightly screws or brackets....

aimg717.imageshack.us_img717_2432_imag0056aoc.jpg


After....

aimg850.imageshack.us_img850_3293_imag0052aoc.jpg


imag0051aoc.jpg


I fully expect the armrest to make the distance driving more comfortable (I'll find out later today) but it's going to take a bit of getting use to for changing gears and putting the handbrake on as it does get in the way a little. All-in-all I'm pleased with the armrest and will definately stick with it for now :).
 

Attachments

  • aimg833.imageshack.us_img833_1451_imag0051aoc.jpg
    aimg833.imageshack.us_img833_1451_imag0051aoc.jpg
    49.7 KB · Views: 235
  • aimg850.imageshack.us_img850_64_imag0055aoc.jpg
    aimg850.imageshack.us_img850_64_imag0055aoc.jpg
    35 KB · Views: 240
  • aimg836.imageshack.us_img836_2325_imag0054aoc.jpg
    aimg836.imageshack.us_img836_2325_imag0054aoc.jpg
    40.5 KB · Views: 248
  • aimg560.imageshack.us_img560_1940_imag0050aoc1.jpg
    aimg560.imageshack.us_img560_1940_imag0050aoc1.jpg
    50.4 KB · Views: 239

Dave One

Regular Member
Irmscher door pins fitted
It's been a while since my last update but I've been busy on the car......
I got bored of the standard door pins and decided Irmscher brushed metal door pins were the way forward. Here's the pics...
Standard door pins
imag0057aoc.jpg

Irmscher door pins (unlocked)
aimg403.imageshack.us_img403_9875_imag0059aoc.jpg

Irmscher door pins (locked)
imag0060aoc.jpg

Opel valve caps
Next it was time to change the standard valve caps for some Opel valve caps.
aimg215.imageshack.us_img215_2526_imag0064aoc.jpg

Ready to fit......
imag0062aoc.jpg

Fitted......
imag0065aoc.jpg
 

Attachments

  • aimg18.imageshack.us_img18_1996_imag0065aoc.jpg
    aimg18.imageshack.us_img18_1996_imag0065aoc.jpg
    25.1 KB · Views: 216
  • aimg215.imageshack.us_img215_2526_imag0064aoc.jpg
    aimg215.imageshack.us_img215_2526_imag0064aoc.jpg
    24.6 KB · Views: 238
  • aimg403.imageshack.us_img403_9875_imag0059aoc.jpg
    aimg403.imageshack.us_img403_9875_imag0059aoc.jpg
    60.5 KB · Views: 214

Dave One

Regular Member
160 mph clocks fitted, with additional dash indications
I wanted to use some redundant dash lights to provide Car PC status indication and get the cruise control indication working too. As I intend to get hold of a set of Innoparts plasms dials I thought I may as well invest the time in some Innoparts compatiable clocks. My car has White Petrol 140 mph clocks but Innoparts requires Black Petrol 140 mph or White Petrol 160 mph, so I opted for the White Petrol 160 mph (thanks buzball - the first set had a broken connector, unreadable mileage panel and random LED for an alarm in the centre.....).
The plan was to use the current Dash LED illumination with one additional LED for Car PC status indication. The vision was to use 'auto-transmission sport mode' (currently amber) as the 'Car PC on' indication (a green 'system on' indicator). The other indication would be two fold, a 'Permanent live with ignition on' as amber (the current 'auto-transmission warning' that's amber) with an additional LED in the same lens to indicate 'Permanent live with ignition off' in red.
Furthermore, I installed the cruise control circuit designed by SQ Man. This circuit has five relays and eleven diodes. There are some limitations with this circuit but it works, and is a great starting point .... The first limitation is that the circuit can be activated at any speed, thus representing cruise control on when the cruise control isn't on. This is because the stalk activation line triggers the circuits within the LED mode as well as the ECU, but the ECU knows the car does not have the required speed. This does allow a test when static on the drive . The other limitation is the when the clutch or brake is pressed the relays click, even if the cruise control is not engaged. This is because the relay control earth is always present irrespective of cruise control state. I'm looking to develop this further - watch this space...
For both circuits I needed to adapt the dash speedo clocks wiring harness. This was done by using a donor dash speedo connector (thanks scott_sxi) to insert four more pins; two for the Car PC mod (pins 5 and 6), one for the cruise control (pin 14) and one in preparation for the Xenon auto-leveller retro-fit (pin 15).
aimg196.imageshack.us_img196_6435_imag0091aoc.jpg

aimg408.imageshack.us_img408_5227_imag0093aoc.jpg

I'll post circuit diagrams of both circuit when I get a chance to do them neatly..... In the meantime here's the Car PC relay set in its enclosure. The ciruit consists of three relays and three diodes but is specific to my Car PC switch circuitry.
aimg403.imageshack.us_img403_6861_imag0094aoc.jpg

The end result is fantastic, even if I do say so myself but is the result of many hours work........
140 mph clock set
aimg593.imageshack.us_img593_8433_imag0087aoc.jpg

160 mph clock set with 'Car PC on' indication illuminated
aimg846.imageshack.us_img846_5061_imag0096aoc.jpg

'Car PC on' indication and 'cruise control' indication illuminated
aimg819.imageshack.us_img819_9580_imag0098aoc.jpg

'Car PC permenant live with ignition on' and 'cruise control' indication illuminated
aimg51.imageshack.us_img51_1521_imag0099aoc.jpg

'Car PC permenant live with ignition off' indication illuminated
aimg839.imageshack.us_img839_6937_imag0100aoc.jpg

It's now time to go and further develop the cruise control circuit so the brake and clutch switch relays are inactive when the cruise control isn't engaged :).
 

Attachments

  • aimg819.imageshack.us_img819_9580_imag0098aoc.jpg
    aimg819.imageshack.us_img819_9580_imag0098aoc.jpg
    38.7 KB · Views: 239
  • aimg51.imageshack.us_img51_1521_imag0099aoc.jpg
    aimg51.imageshack.us_img51_1521_imag0099aoc.jpg
    36.7 KB · Views: 248
  • aimg839.imageshack.us_img839_6937_imag0100aoc.jpg
    aimg839.imageshack.us_img839_6937_imag0100aoc.jpg
    36.2 KB · Views: 233
  • aimg846.imageshack.us_img846_5061_imag0096aoc.jpg
    aimg846.imageshack.us_img846_5061_imag0096aoc.jpg
    37.6 KB · Views: 251
  • aimg196.imageshack.us_img196_6435_imag0091aoc.jpg
    aimg196.imageshack.us_img196_6435_imag0091aoc.jpg
    31.3 KB · Views: 257
  • aimg408.imageshack.us_img408_5227_imag0093aoc.jpg
    aimg408.imageshack.us_img408_5227_imag0093aoc.jpg
    30.5 KB · Views: 259
  • aimg403.imageshack.us_img403_6861_imag0094aoc.jpg
    aimg403.imageshack.us_img403_6861_imag0094aoc.jpg
    40 KB · Views: 247
  • aimg593.imageshack.us_img593_8433_imag0087aoc.jpg
    aimg593.imageshack.us_img593_8433_imag0087aoc.jpg
    37 KB · Views: 242

Dave One

Regular Member
Additional speedo notes
I should point out that the mileage of the old clocks has been recorded (not least in the pics) and the new clocks will be adjusted (with any additional driven mileage) when I get Op-Com installed this week.
I also wanted to thank Kev. for providing valuable info on the Innoparts plasma dial requirements and resetting of instrument needles.
 

Dave One

Regular Member
Micro update
Mileage on the working set of 160 clocks updated to reflect actual mileage (445 miles that week alone). This really needed doing to save confusion at the MOT.
The car went in for a MOT yesterday and passed with advisory on the park brake efficiency and slightly corroded brake pipes. I'm looking out for an Astra G 4-stud rear disc setup as the brake shoes need replacing soon, presenting the ideal opportunity to upgrade :).
 

Dave One

Regular Member
Car PC Voice Control
The Beta voice control software I had available on Win XP had not been modifed for use on Win 7 or with the modified Car PC front end application environment. Fortunantely, a Car PC forum moderator continued development with fantastic results. The recognition is good and can been programmed to react to specific commands.
I needed to modify my Labtec desktop microphone to integrated into the car and decided the interior light would be an ideal location for it. This would require stripping the microphone, extending the internal wiring and concealing it to look OEM.
The Labtec desktop microphone.
aimg513.imageshack.us_img513_5530_imag0105aoc.jpg

aimg685.imageshack.us_img685_6792_imag0106aoc.jpg

The Labtec desktop microphone undergoing some prep...
aimg163.imageshack.us_img163_6769_imag0107aoc.jpg

aimg51.imageshack.us_img51_3159_imag0108aoc.jpg

aimg831.imageshack.us_img831_9691_imag0109aoc.jpg

The internal wiring needed extending, so I desoldered here...
aimg163.imageshack.us_img163_5972_imag0111aoc.jpg

It was more luck than judgement, although I did check prior to ripping it all apart, that the microphone would fit into the alarm sensor housing of the interior lamp (the alarm is not an option on the SXi).
aimg811.imageshack.us_img811_9674_imag0113aoc.jpg

And when fitted back into the car with all the wiring hidden away it looked like...
aimg638.imageshack.us_img638_3981_imag0114aoc.jpg

Steering Wheel Control of the Car PC
Voice control is all well and good but I wanted to use the steering wheel control to manipulate the Car PC, particularly listening for voice control commands. Research lead me to the Velleman K8055 USB experiment board (or VM110 if you want the kit pre-assembled). I needed to integrate this to my Autoleads PC99-x06 steering wheel adapter.
The Autoleads PC99-x06 steering wheel has a 12v and earth feed to create a stable 5v output. When applied to the resistive ladder in the steering wheel circuit the Autoleads PC99-x06 steering wheel output reduces to 3.94v due to resistive loads. Once a steering wheel button is pressed the load changes. This values are captured and recorded to reflect command points within the computer .dll driver.
The result is the ability to dictate what each steering wheel button does as a global control or uniquely in individual screens. This functionality is extended by defining long and short button presses giving a potential of 12 functions in any screen .
As such, I have exclusively programmed one specific button as Microphone on/off.
The Velleman K8055/VM110 board.
aimg46.imageshack.us_img46_2218_imag0119aoc.jpg

aimg7.imageshack.us_img7_37_imag0125aoc.jpg

The test bench :).
aimg210.imageshack.us_img210_2451_imag0123aoc.jpg

aimg193.imageshack.us_img193_706_imag0124aoc.jpg

Dave One official born :)
The guys at work have affectionately nicknamed my car Dave One. In truth they have called it Dave One for years so I decide to create the brand :). I decided it looks good and will be staying :D.
The front end application loading screen...
aimg824.imageshack.us_img824_2233_loaderf.jpg

The front end background...
aimg718.imageshack.us_img718_7060_daveonebackgroundblack8.png

And how it looks embedded within the front end application (all be it on the laptop here)...
aimg6.imageshack.us_img6_3730_imag0139aoc.jpg

More to follow very soon ;)
 

Attachments

  • aimg824.imageshack.us_img824_2233_loaderf.jpg
    aimg824.imageshack.us_img824_2233_loaderf.jpg
    21.3 KB · Views: 212
  • aimg193.imageshack.us_img193_706_imag0124aoc.jpg
    aimg193.imageshack.us_img193_706_imag0124aoc.jpg
    35.5 KB · Views: 226
  • aimg210.imageshack.us_img210_2451_imag0123aoc.jpg
    aimg210.imageshack.us_img210_2451_imag0123aoc.jpg
    36.3 KB · Views: 233
  • aimg7.imageshack.us_img7_37_imag0125aoc.jpg
    aimg7.imageshack.us_img7_37_imag0125aoc.jpg
    28.5 KB · Views: 221
  • aimg718.imageshack.us_img718_7060_daveonebackgroundblack8.png
    aimg718.imageshack.us_img718_7060_daveonebackgroundblack8.png
    17.7 KB · Views: 217
  • aimg6.imageshack.us_img6_3730_imag0139aoc.jpg
    aimg6.imageshack.us_img6_3730_imag0139aoc.jpg
    41 KB · Views: 224
  • aimg46.imageshack.us_img46_2218_imag0119aoc.jpg
    aimg46.imageshack.us_img46_2218_imag0119aoc.jpg
    47.5 KB · Views: 217
  • aimg513.imageshack.us_img513_5530_imag0105aoc.jpg
    aimg513.imageshack.us_img513_5530_imag0105aoc.jpg
    31 KB · Views: 234
  • aimg685.imageshack.us_img685_6792_imag0106aoc.jpg
    aimg685.imageshack.us_img685_6792_imag0106aoc.jpg
    31.7 KB · Views: 208
  • aimg163.imageshack.us_img163_6769_imag0107aoc.jpg
    aimg163.imageshack.us_img163_6769_imag0107aoc.jpg
    44.6 KB · Views: 218
  • aimg51.imageshack.us_img51_3159_imag0108aoc.jpg
    aimg51.imageshack.us_img51_3159_imag0108aoc.jpg
    40.8 KB · Views: 230
  • aimg831.imageshack.us_img831_9691_imag0109aoc.jpg
    aimg831.imageshack.us_img831_9691_imag0109aoc.jpg
    43.6 KB · Views: 226
  • aimg638.imageshack.us_img638_3981_imag0114aoc.jpg
    aimg638.imageshack.us_img638_3981_imag0114aoc.jpg
    20.8 KB · Views: 264
  • aimg811.imageshack.us_img811_9674_imag0113aoc.jpg
    aimg811.imageshack.us_img811_9674_imag0113aoc.jpg
    47.4 KB · Views: 237
  • aimg163.imageshack.us_img163_5972_imag0111aoc.jpg
    aimg163.imageshack.us_img163_5972_imag0111aoc.jpg
    39.7 KB · Views: 209

Dave One

Regular Member
Irmscher Boot Struts Fitted
The last update was all about progress on my Car PC, but I have also progressed with the car. The standard boot struts are not 'man enough' to cope with the weight of the GSi boot spoiler, so when I saw Scott_SXi selling a set of Irmscher boot struts I was quick to get them . This should save my from anymore unexpected boot falls on my head, lol .
Nothing interesting to see but here are the pic anyhow....
aimg14.imageshack.us_img14_3154_imag0116aoc.jpg

aimg69.imageshack.us_img69_5500_imag0117aoc.jpg

Bonnet Extension Fitted
Also recently fitted a bonnet extension, which looks really good.
Before...
aimg6.imageshack.us_img6_213_imag0141aoc.jpg

After (btw the car was treated to a wash shortly after as dirty car and clean bonnet extension don't match up to well, lol )
aimg163.imageshack.us_img163_1879_imag0142aoc.jpg

Innoparts Plasma Dial Mats Fitted
My latest project is the fitmant of Innoparts Plasma Dial Mats. I ordered them from Germany, Racing24.de and shipment was only four days :).
I'm only half way through this project as I need to illuminate the dash needles too :).
Here's the Innoparts so far...
aimg821.imageshack.us_img821_1157_imag0146aoc.jpg

The final result will be captured on a better camera ;)
 

Attachments

  • aimg163.imageshack.us_img163_1879_imag0142aoc.jpg
    aimg163.imageshack.us_img163_1879_imag0142aoc.jpg
    44.9 KB · Views: 214
  • aimg821.imageshack.us_img821_1157_imag0146aoc.jpg
    aimg821.imageshack.us_img821_1157_imag0146aoc.jpg
    17 KB · Views: 193
  • aimg6.imageshack.us_img6_213_imag0141aoc.jpg
    aimg6.imageshack.us_img6_213_imag0141aoc.jpg
    49.9 KB · Views: 210
  • aimg69.imageshack.us_img69_5500_imag0117aoc.jpg
    aimg69.imageshack.us_img69_5500_imag0117aoc.jpg
    34.1 KB · Views: 203
  • aimg14.imageshack.us_img14_3154_imag0116aoc.jpg
    aimg14.imageshack.us_img14_3154_imag0116aoc.jpg
    46.6 KB · Views: 213
  • aimg69.imageshack.us_img69_5500_imag0117aoc.jpg
    aimg69.imageshack.us_img69_5500_imag0117aoc.jpg
    34.1 KB · Views: 226
  • aimg6.imageshack.us_img6_213_imag0141aoc.jpg
    aimg6.imageshack.us_img6_213_imag0141aoc.jpg
    49.9 KB · Views: 204
  • aimg163.imageshack.us_img163_1879_imag0142aoc.jpg
    aimg163.imageshack.us_img163_1879_imag0142aoc.jpg
    44.9 KB · Views: 218
  • aimg821.imageshack.us_img821_1157_imag0146aoc.jpg
    aimg821.imageshack.us_img821_1157_imag0146aoc.jpg
    17 KB · Views: 214
  • aimg14.imageshack.us_img14_3154_imag0116aoc.jpg
    aimg14.imageshack.us_img14_3154_imag0116aoc.jpg
    46.6 KB · Views: 209

Dave One

Regular Member
Weather Reminder
Just a quick reminder of the weather three weeks ago. Plenty of snow and -15.5 degrees C.
aimg823.imageshack.us_img823_7684_imag0200aoc.jpg

aimg824.imageshack.us_img824_2900_imag0199aoc.jpg

Innoparts Plasma Dial Mats Illuminated Needles
The Innoparts Plasma Dial Mats were fitted several weeks ago with the promise of following up with illuminated needles very quickly. I eventually got around to completely the instrument binnacle today, allbeit in two phases.
After dismantling the instrument binnacle I drilled a series of holes to mount three red dome LED around the base of each needle.
aimg21.imageshack.us_img21_828_imag0163aoc.jpg

aimg825.imageshack.us_img825_5016_imag0162aoc.jpg

Next came the fun of soldering each LED :). The result is a busy network of wires, as the pic below shows part way through.
aimg818.imageshack.us_img818_5207_imag0165aoc.jpg

The first test during the day, to reset the needles, concerned me due to the needles brightness. However, a night test was much more satisfying, despite the needles being very bright. They're staying for now but I'm already planning changes, just in case they don't work out. Obviously the mobile phone pics don't do the end product justice and I'll try and get some decent pics soon :).
aimg689.imageshack.us_img689_9164_imag0209aoc.jpg

aimg163.imageshack.us_img163_5959_imag0212aoc.jpg

Next up is blue MID :).
 

Attachments

  • aimg163.imageshack.us_img163_5959_imag0212aoc.jpg
    aimg163.imageshack.us_img163_5959_imag0212aoc.jpg
    13.3 KB · Views: 199
  • aimg689.imageshack.us_img689_9164_imag0209aoc.jpg
    aimg689.imageshack.us_img689_9164_imag0209aoc.jpg
    24.1 KB · Views: 206
  • aimg818.imageshack.us_img818_5207_imag0165aoc.jpg
    aimg818.imageshack.us_img818_5207_imag0165aoc.jpg
    45.6 KB · Views: 211
  • aimg825.imageshack.us_img825_5016_imag0162aoc.jpg
    aimg825.imageshack.us_img825_5016_imag0162aoc.jpg
    35.1 KB · Views: 203
  • aimg21.imageshack.us_img21_828_imag0163aoc.jpg
    aimg21.imageshack.us_img21_828_imag0163aoc.jpg
    40.1 KB · Views: 227
  • aimg824.imageshack.us_img824_2900_imag0199aoc.jpg
    aimg824.imageshack.us_img824_2900_imag0199aoc.jpg
    26.7 KB · Views: 206
  • aimg823.imageshack.us_img823_7684_imag0200aoc.jpg
    aimg823.imageshack.us_img823_7684_imag0200aoc.jpg
    42.5 KB · Views: 212

Dave One

Regular Member
Thanks for the comments, there are very much appreciated :D.
Innoparts Plasma Dial Mats Illuminated Needles Update
I just could NOT get on with the really bright red glow from the illuminated needles done recently. I decided to remove all three red dome LEDs from each needle base and replace with one blue flat top LED for each needle base.
I was also hoping to collect my Astra/Zafira blue speedo needles from the post office yesterday but didn't finish in time :(. I reckon the blue needles will make a significant difference :).
A quick pic of the speedo wiring.
aimg19.imageshack.us_img19_8430_imag0220aoc.jpg

The result of the blue LEDs :).
imag0222aoc.jpg

aimg11.imageshack.us_img11_8545_imag0225aoc.jpg

I'm hoping to completely finish the speedo next weekend with a few other minor changes..........
 

Attachments

  • aimg11.imageshack.us_img11_8545_imag0225aoc.jpg
    aimg11.imageshack.us_img11_8545_imag0225aoc.jpg
    18.6 KB · Views: 219
  • aimg19.imageshack.us_img19_8430_imag0220aoc.jpg
    aimg19.imageshack.us_img19_8430_imag0220aoc.jpg
    39 KB · Views: 211

Dave One

Regular Member
Innoparts Plasma Dial Mats Illuminated Needles Finished.....
I ordered some blue Astra G/Zafira A dial needles from eBay to complete the illuminated needles part of the conversion. Apologies for the pic but the phone and camera didn't do the illuminated pics any justice at all :(.
The blue Astra G/Zafira A dial needles from eBay...
aimg526.imageshack.us_img526_4405_imag0234astra.jpg

The Innoparts Plasma Dial Mats with the standard red needles...
aimg138.imageshack.us_img138_5228_imag0233astra.jpg

The Innoparts Plasma Dial Mats after the blue Astra G/Zafira A dial needles were fitted...
aimg694.imageshack.us_img694_25_imag0235astra.jpg

Needle illumination with the Innoparts Plasma Dial Mats fully dim (off)...
aimg836.imageshack.us_img836_175_imag0236astra.jpg

Night Pic of the dial mats fully working...
aimg685.imageshack.us_img685_2821_p1050177astra.jpg

Whilst I had the dials apart I took the opportunity to complete the blue theme by replacing the 'Car PC on' and 'Cruise Control' indicators from green to blue :).
The green 'Car PC on' and 'Cruise Control' indicators (pic taken prior to mileage correction of new unit)...
aimg819.imageshack.us_img819_9580_imag0098aoc.jpg

The blue 'Car PC on' indicator...
aimg13.imageshack.us_img13_4112_p1050184astra.jpg

The blue 'Cruise Control' indicator...
aimg717.imageshack.us_img717_2391_p1050183astra.jpg

Both together...
p1050186astra.jpg

I just need to refit the prespex cover and surround now (5 min job).
New Car PC Microphone Fitted
I've also fitted a new microphone for my Car PC. It has superior noise reduction and directional array to the previous desktop microphone I ripped apart. Its an Andrea Sound Max Superbeam Array mirophone, and fitted prefectly on the lip of the speedo surround (it can be seen in the above pics :)).
I'll attempt a short video clip over the next few weeks to show the Car PC Voice Control in operation, along with the the rest of the Car PC :).
 

Attachments

  • aimg717.imageshack.us_img717_2391_p1050183astra.jpg
    aimg717.imageshack.us_img717_2391_p1050183astra.jpg
    22.3 KB · Views: 192
  • aimg526.imageshack.us_img526_4405_imag0234astra.jpg
    aimg526.imageshack.us_img526_4405_imag0234astra.jpg
    62.8 KB · Views: 201
  • aimg138.imageshack.us_img138_5228_imag0233astra.jpg
    aimg138.imageshack.us_img138_5228_imag0233astra.jpg
    45.9 KB · Views: 206
  • aimg694.imageshack.us_img694_25_imag0235astra.jpg
    aimg694.imageshack.us_img694_25_imag0235astra.jpg
    31.6 KB · Views: 194
  • aimg836.imageshack.us_img836_175_imag0236astra.jpg
    aimg836.imageshack.us_img836_175_imag0236astra.jpg
    38.8 KB · Views: 189
  • aimg685.imageshack.us_img685_2821_p1050177astra.jpg
    aimg685.imageshack.us_img685_2821_p1050177astra.jpg
    25.2 KB · Views: 208
  • aimg819.imageshack.us_img819_9580_imag0098aoc.jpg
    aimg819.imageshack.us_img819_9580_imag0098aoc.jpg
    38.7 KB · Views: 199
  • aimg13.imageshack.us_img13_4112_p1050184astra.jpg
    aimg13.imageshack.us_img13_4112_p1050184astra.jpg
    25.3 KB · Views: 195

Dave One

Regular Member
Mk4 Flip Key Conversion
A straight forward modification this time. I purchased a Mk4 Flip Key from SWC_Scotty. The key cutting cost me £6.70 and I followed MiddleTom's guide on page 3 of SWC_Scotty's Flip Key thread (worth checking out if you're not familiar with these keys ). I also changed the battery too, to save some pain in 6 months time (or however long was left....).
The original key...
aimg33.imageshack.us_img33_9036_imag0250astra.jpg

New flip key...
aimg850.imageshack.us_img850_213_imag0251astra.jpg

And the comparison shot...
aimg100.imageshack.us_img100_2423_imag0253astra.jpg
 

Attachments

  • aimg100.imageshack.us_img100_2423_imag0253astra.jpg
    aimg100.imageshack.us_img100_2423_imag0253astra.jpg
    51.1 KB · Views: 213
  • aimg850.imageshack.us_img850_213_imag0251astra.jpg
    aimg850.imageshack.us_img850_213_imag0251astra.jpg
    65.7 KB · Views: 209
  • aimg33.imageshack.us_img33_9036_imag0250astra.jpg
    aimg33.imageshack.us_img33_9036_imag0250astra.jpg
    53.4 KB · Views: 205

Dave One

Regular Member
ICE for Car PC (losing the head unit)
I've been 'umm-ing' and 'arr-ing' about losing the car stereo head unit in favour of an amplifier and set of aftermarket speakers - but what to go for. I sought advice from a forum member (Gazmondo) who gave advice and options. The result was:
JBL 4 channel amplifier GT5-A604 640w and JBL GT5-12 12" subwoofer with a distribution box...
aimg833.imageshack.us_img833_8494_imag0259astra.jpg

JBL GT5-650C front components...
aimg849.imageshack.us_img849_2632_img1006al.jpg

Kenwood door/rear 110w 100mm dual cone speakers...
aimg27.imageshack.us_img27_7571_img1010l.jpg

I have also ordered an amplifier wiring kit and new distribution blocks to tidy and 'beef up' the current wiring for my Car PC.
Mk5 Wiper Arms Started
A while back I purchased some Mk5 wiper arms and blades from a VXR being broken by Plastic Bob, and Brian kindly donated a pair of Mk4 wiper arms as a donor for 'spline transplant' :).
Pics:
aimg100.imageshack.us_img100_2925_imag0262astra.jpg

aimg84.imageshack.us_img84_5624_imag0261astra.jpg

Next I need to glue and touch up paint.
Steering Wheel Controls
With the instrument binnacle lighting just about sorted out I turned my attention to the next in my view - the steering wheel controls. I wanted to make the Car PC microphone on/off steering wheel button a different colour and opted for green, but changed it to red after the first night drive. The red colour matches the innopart dials rev range and 30 mph marker, as well as the planned conversion of the headlight switch.
The inital fit with a green Car PC microphone on/off steering wheel button (o at the bottom right)...
aimg857.imageshack.us_img857_3079_p1050441astra.jpg

aimg18.imageshack.us_img18_2710_p1050446astra.jpg

aimg641.imageshack.us_img641_9021_p1050448astra.jpg

Then the changed fit with a red Car PC microphone on/off steering wheel button...
aimg600.imageshack.us_img600_4765_imag0271astra.jpg

Aerial Change and Gasket Replaced
The aerial gasket had degraded so I took the opportunity to replace the gasket and change the aerial to a stubby. Iopted for a VW Polo aerial (part number 6R0 035 849 from ebay seller logicman32 for £9.70 delivered - great service and highly recommended).
aimg9.imageshack.us_img9_6918_imag0265astra.jpg

Aerial gasket pics...
aimg585.imageshack.us_img585_5326_p1050563astra.jpg

p1050570astra.jpg

aimg204.imageshack.us_img204_9450_p1050569astra.jpg

aimg151.imageshack.us_img151_8302_p1050568astra.jpg

New aerial pics (prior to gasket change)...
aimg341.imageshack.us_img341_3889_imag0266astra.jpg

aimg9.imageshack.us_img9_6194_imag0267astra.jpg

Rear Interior Light Fitted
I bought a GSi rear interior light from TurboChris last year. I only got around to fitting it whilst the headlining was dropped. Chris had kindly included the wiring loom and the metal surround to finish the hole in the headlining.
I reluctantly made the first incision in the middle of the rear bench, between the grab handles...
aimg135.imageshack.us_img135_1973_p1050564astra.jpg

Offered up the metal surround as a template...
aimg442.imageshack.us_img442_1149_p1050565astra.jpg

'Piggy-backed' off the near-side rear grab handle...
p1050571astra.jpg

aimg685.imageshack.us_img685_663_p1050574astra.jpg

Pics of the GSi rear interior light fitted...
aimg801.imageshack.us_img801_3729_p1050576astra.jpg

aimg827.imageshack.us_img827_5785_p1050566astra.jpg

aimg337.imageshack.us_img337_9992_p1050575astra.jpg
 

Attachments

  • aimg442.imageshack.us_img442_1149_p1050565astra.jpg
    aimg442.imageshack.us_img442_1149_p1050565astra.jpg
    29.2 KB · Views: 225
  • aimg135.imageshack.us_img135_1973_p1050564astra.jpg
    aimg135.imageshack.us_img135_1973_p1050564astra.jpg
    33.3 KB · Views: 199
  • aimg9.imageshack.us_img9_6194_imag0267astra.jpg
    aimg9.imageshack.us_img9_6194_imag0267astra.jpg
    27.9 KB · Views: 221
  • aimg341.imageshack.us_img341_3889_imag0266astra.jpg
    aimg341.imageshack.us_img341_3889_imag0266astra.jpg
    69.2 KB · Views: 186
  • aimg337.imageshack.us_img337_9992_p1050575astra.jpg
    aimg337.imageshack.us_img337_9992_p1050575astra.jpg
    40.1 KB · Views: 200
  • aimg827.imageshack.us_img827_5785_p1050566astra.jpg
    aimg827.imageshack.us_img827_5785_p1050566astra.jpg
    43.3 KB · Views: 203
  • aimg801.imageshack.us_img801_3729_p1050576astra.jpg
    aimg801.imageshack.us_img801_3729_p1050576astra.jpg
    16.4 KB · Views: 181
  • aimg685.imageshack.us_img685_663_p1050574astra.jpg
    aimg685.imageshack.us_img685_663_p1050574astra.jpg
    88.1 KB · Views: 186
  • aimg151.imageshack.us_img151_8302_p1050568astra.jpg
    aimg151.imageshack.us_img151_8302_p1050568astra.jpg
    25.8 KB · Views: 181
  • aimg641.imageshack.us_img641_9021_p1050448astra.jpg
    aimg641.imageshack.us_img641_9021_p1050448astra.jpg
    7.5 KB · Views: 195
  • aimg18.imageshack.us_img18_2710_p1050446astra.jpg
    aimg18.imageshack.us_img18_2710_p1050446astra.jpg
    53.6 KB · Views: 196
  • aimg857.imageshack.us_img857_3079_p1050441astra.jpg
    aimg857.imageshack.us_img857_3079_p1050441astra.jpg
    54 KB · Views: 201
  • aimg84.imageshack.us_img84_5624_imag0261astra.jpg
    aimg84.imageshack.us_img84_5624_imag0261astra.jpg
    32.5 KB · Views: 186
  • aimg100.imageshack.us_img100_2925_imag0262astra.jpg
    aimg100.imageshack.us_img100_2925_imag0262astra.jpg
    46 KB · Views: 185
  • aimg27.imageshack.us_img27_7571_img1010l.jpg
    aimg27.imageshack.us_img27_7571_img1010l.jpg
    30 KB · Views: 202
  • aimg849.imageshack.us_img849_2632_img1006al.jpg
    aimg849.imageshack.us_img849_2632_img1006al.jpg
    42.6 KB · Views: 192
  • aimg833.imageshack.us_img833_8494_imag0259astra.jpg
    aimg833.imageshack.us_img833_8494_imag0259astra.jpg
    41 KB · Views: 199
  • aimg600.imageshack.us_img600_4765_imag0271astra.jpg
    aimg600.imageshack.us_img600_4765_imag0271astra.jpg
    15.7 KB · Views: 196
  • aimg204.imageshack.us_img204_9450_p1050569astra.jpg
    aimg204.imageshack.us_img204_9450_p1050569astra.jpg
    23.1 KB · Views: 176
  • aimg585.imageshack.us_img585_5326_p1050563astra.jpg
    aimg585.imageshack.us_img585_5326_p1050563astra.jpg
    29.8 KB · Views: 192
  • aimg9.imageshack.us_img9_6918_imag0265astra.jpg
    aimg9.imageshack.us_img9_6918_imag0265astra.jpg
    19.1 KB · Views: 196

Dave One

Regular Member
Illuminated Sunvisors Wired Up
There's not much to say really. I've connected them to ignition live so as they can't drain my battery if inadvertantly left open. White 6 LED bulbs were a must :).
aimg6.imageshack.us_img6_692_p1050580astra.jpg

Thought I'd also try and capture the rear interior light fitted yesterday (this needs white LEDs - on order :))
p1050581astra.jpg
 

Attachments

  • aimg6.imageshack.us_img6_692_p1050580astra.jpg
    aimg6.imageshack.us_img6_692_p1050580astra.jpg
    42.6 KB · Views: 246

Dave One

Regular Member
Headlight Switch Prototype
The dash conversion continues..... :). Unfortunately the camera doesn't do the lighting justice :(.
The headlight switch prototype...
aimg98.imageshack.us_img98_4688_p1050582astra.jpg

A dash progress pic...
aimg24.imageshack.us_img24_4821_p1050583astra.jpg
 

Dave One

Regular Member
Landmark Mileage
The poor old motor hit a landmark mileage of two hundred thousand miles on 7th May...........
aimg12.imageshack.us_img12_4889_imag0288aoc.jpg

Shortly followed by two hundred and two thousand, two hundred and twenty two miles on the 16th June........
aimg715.imageshack.us_img715_9180_imag0330aoc.jpg

A couple of random headlight shots
aimg850.imageshack.us_img850_6985_imag0334aoc.jpg

aimg713.imageshack.us_img713_5227_imag0335aoc.jpg

Blue Dash Continued....
At long last I got around to sorting out my MID conversion display to blue. I used the Quad SMD from CrazyLEDs. I ended up having to swap the filter too
:(.....
aimg17.imageshack.us_img17_7415_imag0344aoc.jpg

The overall dash looks like this (unfortunately HTC and night shots don't combine very well :()
aimg507.imageshack.us_img507_2707_imag0345aoc.jpg

The Heater Control Panel followed two days later (again the HTC shots are real bad - sorry!)
aimg201.imageshack.us_img201_9483_imag0350aoc.jpg

A couple of nights shots too.......
aimg21.imageshack.us_img21_9107_imag0351aoc.jpg

aimg687.imageshack.us_img687_8940_imag0352aoc.jpg

Illuminated cigarette lighter surround ordered :)
 

Attachments

  • aimg21.imageshack.us_img21_9107_imag0351aoc.jpg
    aimg21.imageshack.us_img21_9107_imag0351aoc.jpg
    9 KB · Views: 201
  • aimg687.imageshack.us_img687_8940_imag0352aoc.jpg
    aimg687.imageshack.us_img687_8940_imag0352aoc.jpg
    7.5 KB · Views: 187
  • aimg201.imageshack.us_img201_9483_imag0350aoc.jpg
    aimg201.imageshack.us_img201_9483_imag0350aoc.jpg
    43.5 KB · Views: 190
  • aimg12.imageshack.us_img12_4889_imag0288aoc.jpg
    aimg12.imageshack.us_img12_4889_imag0288aoc.jpg
    24.3 KB · Views: 198
  • aimg715.imageshack.us_img715_9180_imag0330aoc.jpg
    aimg715.imageshack.us_img715_9180_imag0330aoc.jpg
    27.1 KB · Views: 172
  • aimg850.imageshack.us_img850_6985_imag0334aoc.jpg
    aimg850.imageshack.us_img850_6985_imag0334aoc.jpg
    46.3 KB · Views: 188
  • aimg713.imageshack.us_img713_5227_imag0335aoc.jpg
    aimg713.imageshack.us_img713_5227_imag0335aoc.jpg
    41.5 KB · Views: 182
  • aimg17.imageshack.us_img17_7415_imag0344aoc.jpg
    aimg17.imageshack.us_img17_7415_imag0344aoc.jpg
    27.5 KB · Views: 194
  • aimg507.imageshack.us_img507_2707_imag0345aoc.jpg
    aimg507.imageshack.us_img507_2707_imag0345aoc.jpg
    11.4 KB · Views: 202

Dave One

Regular Member
Irmscher Pedals fitted

I've had these pedals for a while from Turbo Chris and finally got around to fully fitting them today. Ideally I would have had the brake and clutch pedals at the same height but unfortunately there was now amount of carefully alignment that was going to alter the alignment. That said, I'm really pleased with the outcome.

A pic before...

aimg84.imageshack.us_img84_1832_imag0297aoc.jpg


And a couple of pics after (the car needs a hoover and the drivers mat needs replacing - PM if you know of any Opel RHD mats please :))

aimg839.imageshack.us_img839_3514_imag0359aoc.jpg


aimg171.imageshack.us_img171_1416_imag0363aoc.jpg


Mk5 wiper arms progressed a little too. I shall hopefully fit them this week :).
 

Attachments

  • aimg171.imageshack.us_img171_1416_imag0363aoc.jpg
    aimg171.imageshack.us_img171_1416_imag0363aoc.jpg
    18.7 KB · Views: 167
  • aimg839.imageshack.us_img839_3514_imag0359aoc.jpg
    aimg839.imageshack.us_img839_3514_imag0359aoc.jpg
    22.1 KB · Views: 185
  • aimg84.imageshack.us_img84_1832_imag0297aoc.jpg
    aimg84.imageshack.us_img84_1832_imag0297aoc.jpg
    24.2 KB · Views: 198

Dave One

Regular Member
Update Time - Mk5 Wiper Mod
At last, Mk5 wiper mod complete. I'd already decided to go down the hard route and use a set of donor Mk4 wiper arms (thanks Bri ). After some messing about I managed to flush, glue and paint them.
The finished article looked like...
aimg687.imageshack.us_img687_1377_imag0389astra.jpg

I initially purchased some Mk5 wiper arm caps but the Mk5 is securing point is M10 whereas the Mk4 is M8, so I ordered these to finish it off (despite the bonnet extension covering it up)...
aimg11.imageshack.us_img11_7020_imag0392astra.jpg

To look like this...
aimg201.imageshack.us_img201_6201_imag0390astra.jpg

And completed with the bonnet extension back on...
aimg255.imageshack.us_img255_5650_imag0393astra.jpg

I haven't needed to trim them at all yet but the drivers side is very close to the top of the screen and will need trimming a touch .
Steering Wheel Controls Colour Change (again....)

I decided I don't like the red steering wheel control that identifies the mic on/off button, so I changed it to white. Here's the pics from the initial green, to red, to white....
aimg838.imageshack.us_img838_9021_p1050448astra.jpg

aimg266.imageshack.us_img266_4765_imag0271astra.jpg

aimg217.imageshack.us_img217_7190_p1060963astra.jpg

I think I'm happy with the white one, for now........
 

Attachments

  • aimg217.imageshack.us_img217_7190_p1060963astra.jpg
    aimg217.imageshack.us_img217_7190_p1060963astra.jpg
    12.5 KB · Views: 181
  • aimg266.imageshack.us_img266_4765_imag0271astra.jpg
    aimg266.imageshack.us_img266_4765_imag0271astra.jpg
    15.7 KB · Views: 172
  • aimg687.imageshack.us_img687_1377_imag0389astra.jpg
    aimg687.imageshack.us_img687_1377_imag0389astra.jpg
    66.6 KB · Views: 194
  • aimg11.imageshack.us_img11_7020_imag0392astra.jpg
    aimg11.imageshack.us_img11_7020_imag0392astra.jpg
    28.4 KB · Views: 189
  • aimg201.imageshack.us_img201_6201_imag0390astra.jpg
    aimg201.imageshack.us_img201_6201_imag0390astra.jpg
    37.9 KB · Views: 198
  • aimg255.imageshack.us_img255_5650_imag0393astra.jpg
    aimg255.imageshack.us_img255_5650_imag0393astra.jpg
    21.6 KB · Views: 166
  • aimg838.imageshack.us_img838_9021_p1050448astra.jpg
    aimg838.imageshack.us_img838_9021_p1050448astra.jpg
    7.5 KB · Views: 176

Dave One

Regular Member
Car PC Switches Incorporated into the Pillar Pod
I've been hunting down some decent switches for the Car PC and finally found some black switches with a blue LED halo. With a relay I can use the switching so the Car PC is completely off, ignition following or permanently on.
Whilst setting about installing the switches into the pillar pod I decided to make some room under the dash and relocate the two double throw relays and timer delay relay used for remote and 'refuelling'. To hide these in the pillar pod I needed to use smaller enclosure.
The massive box that was under the dash...
aimg38.imageshack.us_img38_4235_imag0417astra.jpg

The relay PCBs...
aimg515.imageshack.us_img515_7328_imag0406astra.jpg

Neatly enclosed and labelled ...
aimg4.imageshack.us_img4_9351_imag0410astra.jpg

Pillar Pod in...
aimg708.imageshack.us_img708_2671_p1060964astra.jpg

Prosport Smoked 52mm Evo Gauge added to pillar pod :) (I sourced the gauge from R-Spec Performance Products Ltd - Top Guys and very highly recommended)...
aimg542.imageshack.us_img542_7509_p1060966astra.jpg

Outside view...
aimg546.imageshack.us_img546_7594_p1060967astra.jpg

Dash view...
aimg571.imageshack.us_img571_5024_p1060968astra.jpg

Night shot showing both black switches with a blue LED halos and the Prosport Smoked 52mm Evo Gauge working without the Car PC on...
aimg543.imageshack.us_img543_5086_p1060974astra.jpg

aimg189.imageshack.us_img189_6605_p1060970astra.jpg

Car PC reconnected ...
aimg35.imageshack.us_img35_6287_p1060971astra.jpg
 

Attachments

  • aimg543.imageshack.us_img543_5086_p1060974astra.jpg
    aimg543.imageshack.us_img543_5086_p1060974astra.jpg
    13.9 KB · Views: 191
  • aimg189.imageshack.us_img189_6605_p1060970astra.jpg
    aimg189.imageshack.us_img189_6605_p1060970astra.jpg
    9.8 KB · Views: 182
  • aimg35.imageshack.us_img35_6287_p1060971astra.jpg
    aimg35.imageshack.us_img35_6287_p1060971astra.jpg
    16.7 KB · Views: 200
  • aimg571.imageshack.us_img571_5024_p1060968astra.jpg
    aimg571.imageshack.us_img571_5024_p1060968astra.jpg
    52.9 KB · Views: 202
  • aimg546.imageshack.us_img546_7594_p1060967astra.jpg
    aimg546.imageshack.us_img546_7594_p1060967astra.jpg
    29.4 KB · Views: 180
  • aimg38.imageshack.us_img38_4235_imag0417astra.jpg
    aimg38.imageshack.us_img38_4235_imag0417astra.jpg
    51.1 KB · Views: 188
  • aimg515.imageshack.us_img515_7328_imag0406astra.jpg
    aimg515.imageshack.us_img515_7328_imag0406astra.jpg
    43.4 KB · Views: 189
  • aimg4.imageshack.us_img4_9351_imag0410astra.jpg
    aimg4.imageshack.us_img4_9351_imag0410astra.jpg
    49.3 KB · Views: 207
  • aimg708.imageshack.us_img708_2671_p1060964astra.jpg
    aimg708.imageshack.us_img708_2671_p1060964astra.jpg
    42.6 KB · Views: 190
  • aimg542.imageshack.us_img542_7509_p1060966astra.jpg
    aimg542.imageshack.us_img542_7509_p1060966astra.jpg
    55.9 KB · Views: 183
Top