Parts Required
13mm Socket
E12 Star Socket
15mm Open End Spanner
Long socket extension
5mm Parallel pin punch and socket to fit over end
Standard Hammer
Cable Ties
10mm Spanner
5mm Allen Key
Varios Screwdrivers inc. Small Electric Type for circlip removal
Mirror of some description
Step 1
Remove the top plastic engine cover to prevent damage, replace the oil filler cap.
Step 2
Find your stereo codes so you can reset it later, disconnect battery, remove lead from battery, undo battery retaining clamp and remove battery from tray. Remove battery tray, 3 x 13mm bolts.
Step 3
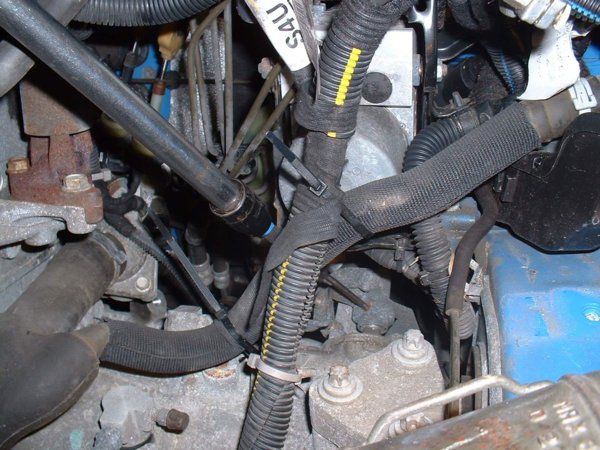
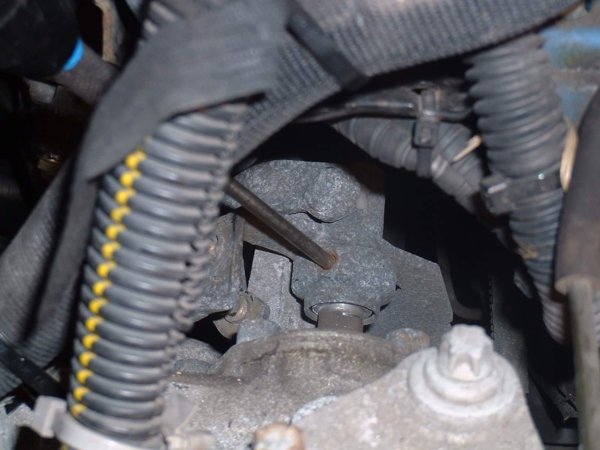
Tie the water pipe and battery lead out of the way with cable ties; you should now be able to see the little pin in the old gear shift. This is what you are aiming to drift out.
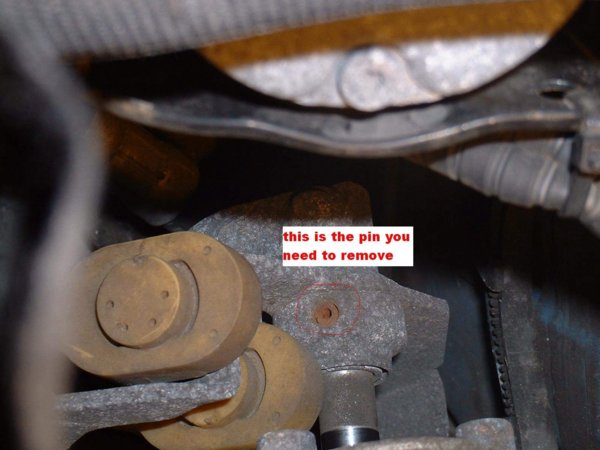
Step 4
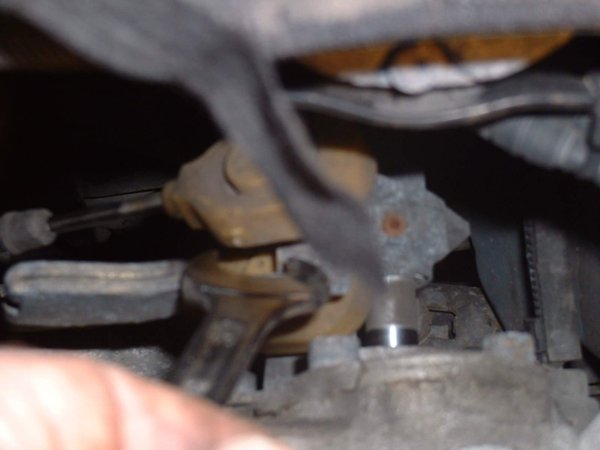
Using an open ended spanner of about 15mm prise the gear cables off the round mounting pins. Do this for the upper one and the lower one. This can be a bit difficult, but persevere and they will come off.
Step 5
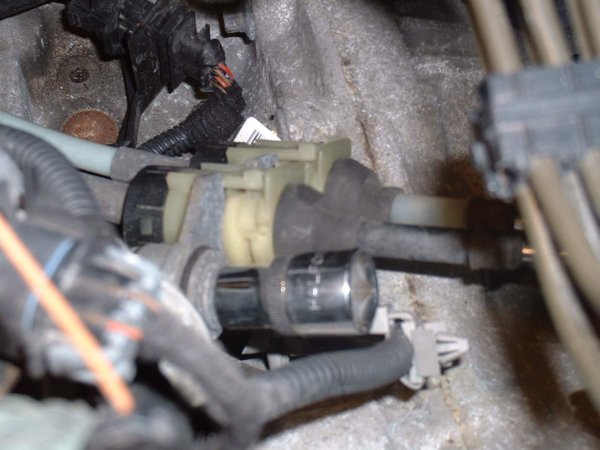
Remove the bracket that holds the gear cables to the engine. Use an E12 star socket. Be careful to retain both halves of the rubber donut from the top mount. Pull the bracket and cables off the lower mount
Step 6
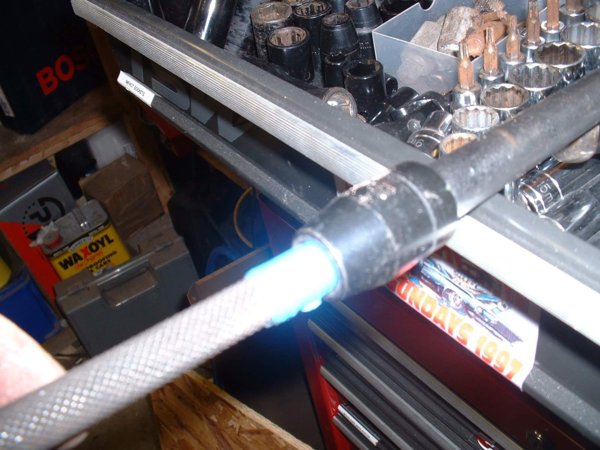
Find a 5mm parallel drift and place a suitable socket over the end, I used some tape to make it a snug fit. Then place a long extension bar into the socket so that you have a drift of about18 inches long. This is the only way you will get the pin out. Locate the pin in the shift linkage and place the end of the drift onto it. Hammer away on the end of the drift until the pin drops out of the linkage. I did not need to use a lot of force; a standard size hammer was fine.
Step 7
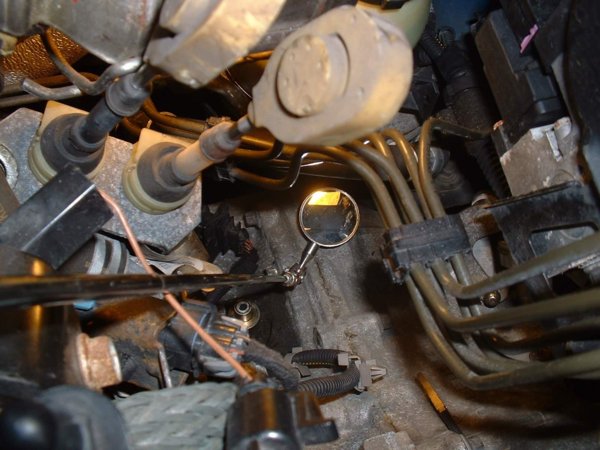
Find a mirror and place it under the pivot pin of the outer linkage, you should see a circlip that retains the pivot. Using a small electronic style screwdriver prise the circlip out and retain the plastic ring that sits underneath it. Pull the outer linkage up and out of the pivot. You can now remove the shift linkage from the shaft in the box, just pull it away it should come. Retain the rubber boot that sits inside it. This pic shows the outer linkage removed with the circlip and plastic washer replaced back onto the pivot pin.
Step 8
Put the kettle on, the tough bit is over!!!!!!
Step 9
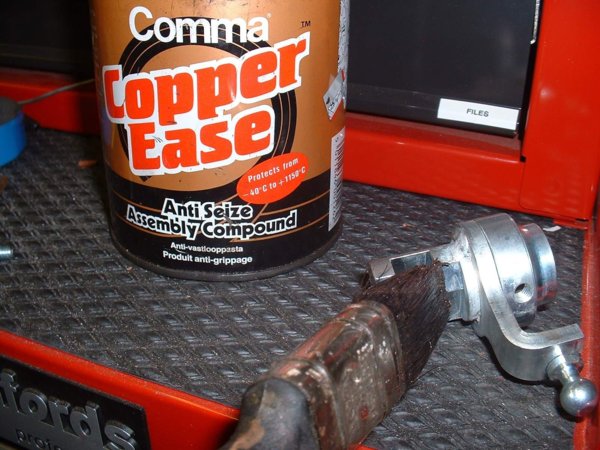
Grease up the slot in the new quick shift, place the rubber boot inside it and make sure that the holes line up for the retaining bolt. I used some silicone spray to lube up the boot before sliding the whole lot onto the gearbox shaft. If you don’t have silicone spray try some
Step 10
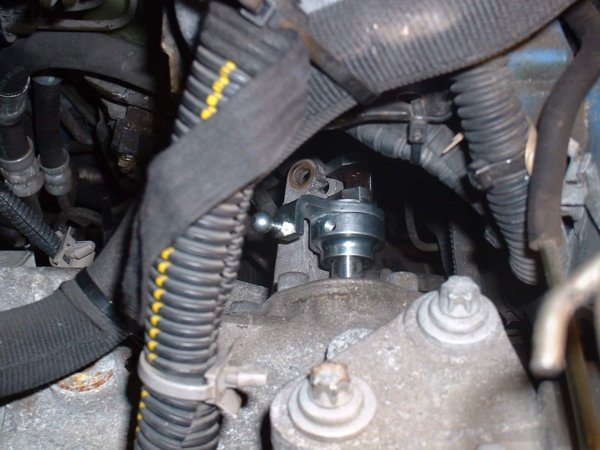
You may need to wiggle the gearbox shaft about a bit to get the new linkage over it as it is close to the outer linkage bracket. Once the linkage is on the shaft install the retaining bolt and tight up. I used some Loctite thread seal on this.
Step 11
Replace the outer linkage in to the pivot, replace the plastic washer and the circlip, using the mirror the make sure you get the circlip in correctly. This bit can be fiddly as you are working upside down and back to front in the mirror.
Step 12
Check that you can manually select gears in the box. There should be no problems and all should work smoothly.
Step 13
Lower the gear cable bracket onto the lower pivot and replace and tighten up the retaining bolt, do remember that you are tightening
into aluminium and therefore don’t over tighten it or you’ll wish you hadn’t got up today.
Step 14
Place the cable ends onto the round balls and push them home.
Step 15
Untie the water pipe and battery cables, refit battery tray, reconnect battery, replace all other parts that you removed such as engine cover etc.
Step 16
Try the gear change from inside the car. You won’t feel a great deal of difference, but once you get it out on the road all will be revealed.
13mm Socket
E12 Star Socket
15mm Open End Spanner
Long socket extension
5mm Parallel pin punch and socket to fit over end
Standard Hammer
Cable Ties
10mm Spanner
5mm Allen Key
Varios Screwdrivers inc. Small Electric Type for circlip removal
Mirror of some description
Step 1
Remove the top plastic engine cover to prevent damage, replace the oil filler cap.
Step 2
Find your stereo codes so you can reset it later, disconnect battery, remove lead from battery, undo battery retaining clamp and remove battery from tray. Remove battery tray, 3 x 13mm bolts.
Step 3
Tie the water pipe and battery lead out of the way with cable ties; you should now be able to see the little pin in the old gear shift. This is what you are aiming to drift out.

Step 4
Using an open ended spanner of about 15mm prise the gear cables off the round mounting pins. Do this for the upper one and the lower one. This can be a bit difficult, but persevere and they will come off.

Step 5
Remove the bracket that holds the gear cables to the engine. Use an E12 star socket. Be careful to retain both halves of the rubber donut from the top mount. Pull the bracket and cables off the lower mount

Step 6
Find a 5mm parallel drift and place a suitable socket over the end, I used some tape to make it a snug fit. Then place a long extension bar into the socket so that you have a drift of about18 inches long. This is the only way you will get the pin out. Locate the pin in the shift linkage and place the end of the drift onto it. Hammer away on the end of the drift until the pin drops out of the linkage. I did not need to use a lot of force; a standard size hammer was fine.


Step 7
Find a mirror and place it under the pivot pin of the outer linkage, you should see a circlip that retains the pivot. Using a small electronic style screwdriver prise the circlip out and retain the plastic ring that sits underneath it. Pull the outer linkage up and out of the pivot. You can now remove the shift linkage from the shaft in the box, just pull it away it should come. Retain the rubber boot that sits inside it. This pic shows the outer linkage removed with the circlip and plastic washer replaced back onto the pivot pin.

Step 8
Put the kettle on, the tough bit is over!!!!!!
Step 9
Grease up the slot in the new quick shift, place the rubber boot inside it and make sure that the holes line up for the retaining bolt. I used some silicone spray to lube up the boot before sliding the whole lot onto the gearbox shaft. If you don’t have silicone spray try some

Step 10
You may need to wiggle the gearbox shaft about a bit to get the new linkage over it as it is close to the outer linkage bracket. Once the linkage is on the shaft install the retaining bolt and tight up. I used some Loctite thread seal on this.

Step 11
Replace the outer linkage in to the pivot, replace the plastic washer and the circlip, using the mirror the make sure you get the circlip in correctly. This bit can be fiddly as you are working upside down and back to front in the mirror.
Step 12
Check that you can manually select gears in the box. There should be no problems and all should work smoothly.
Step 13
Lower the gear cable bracket onto the lower pivot and replace and tighten up the retaining bolt, do remember that you are tightening
into aluminium and therefore don’t over tighten it or you’ll wish you hadn’t got up today.
Step 14
Place the cable ends onto the round balls and push them home.
Step 15
Untie the water pipe and battery cables, refit battery tray, reconnect battery, replace all other parts that you removed such as engine cover etc.
Step 16
Try the gear change from inside the car. You won’t feel a great deal of difference, but once you get it out on the road all will be revealed.