You are using an out of date browser. It may not display this or other websites correctly.
You should upgrade or use an alternative browser.
You should upgrade or use an alternative browser.
Project Freeze My Ass Off (rear Poly Bush's Astra G)
- Thread starter evocarlos
- Start date
astra22bertoneauto
Senior Member
That looks really neat  Glad the pictures helped.
i poped up to the scrappy to get the 3rd bolt for the washer bottle and got some steering wheel controls as i broke a plastic button on mine
just waiting on the pump and relay to arrive now then its mot time friday morning
think i may put the new bits on the front tomorrow if its nice and not windy as hell like today
here a how to change the LED's in the radio controls on the steering wheel
remove the controls from the steering wheel

from the rear of the controls prise the tabs in that hold the covers in place do the top and bottom then the middle last (dont lose the springs)

then you should be left with this ive marked the + and - on the pic

to remove the old leds you will need to add some solder to the pads with a soldering iron use an iron thats no more than 18w any more would damage the tracks on the pcb
the trick to remove the LED's once you have the extra solder is to swap between the the to pads quickly it should come off on the iron when its just right

im going with bright white LED's there 1206 footprint (+and - of the leds are marked in the pic but the minus is marked on the led with a green dot highlighted by the yellow arrow)

ive got a tin of flux that comes in handy i dip the leds in the flux this helps solder the led to the pcb and helps hold it in place while messing

there on (theres and error in the pic the led to the far left is the wrong way round but i fixed it now)

and a test with the multi meter just to show there right and working

its then just a case of refitting the covers middle one 1st then either top or bottom then refit to the car
oh unrelated but i thought this was cool to

just waiting on the pump and relay to arrive now then its mot time friday morning
think i may put the new bits on the front tomorrow if its nice and not windy as hell like today
here a how to change the LED's in the radio controls on the steering wheel
remove the controls from the steering wheel
from the rear of the controls prise the tabs in that hold the covers in place do the top and bottom then the middle last (dont lose the springs)
then you should be left with this ive marked the + and - on the pic
to remove the old leds you will need to add some solder to the pads with a soldering iron use an iron thats no more than 18w any more would damage the tracks on the pcb
the trick to remove the LED's once you have the extra solder is to swap between the the to pads quickly it should come off on the iron when its just right
im going with bright white LED's there 1206 footprint (+and - of the leds are marked in the pic but the minus is marked on the led with a green dot highlighted by the yellow arrow)
ive got a tin of flux that comes in handy i dip the leds in the flux this helps solder the led to the pcb and helps hold it in place while messing
there on (theres and error in the pic the led to the far left is the wrong way round but i fixed it now)
and a test with the multi meter just to show there right and working
its then just a case of refitting the covers middle one 1st then either top or bottom then refit to the car
oh unrelated but i thought this was cool to

right im back from my MOT
its a PASS with 2 provisos 2 front tires split on the inner tire wall and passenger side ARB drop link has movement in one joint
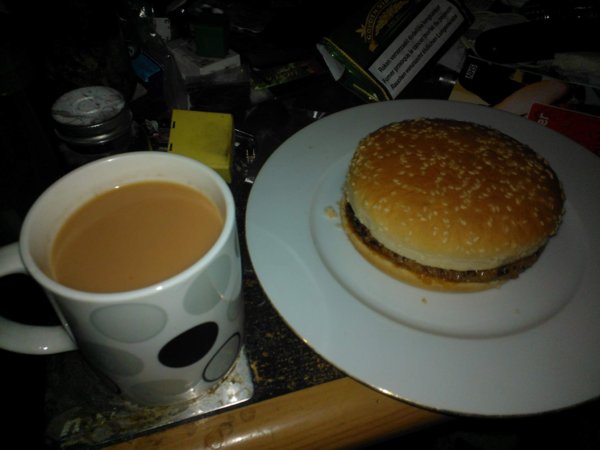
i then treated myself to a donkey burger and a cuppa
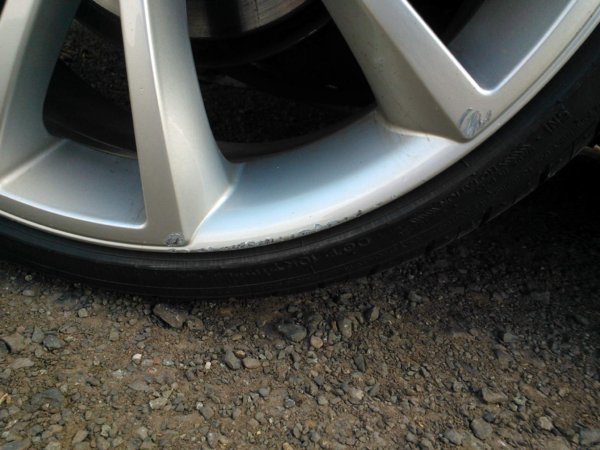
i did notice that one of the rear discs has some scoring lines so went a picked up a set of new pads the ones that came with the discs were cack and i think the caliper is sticking some
but while parking up to get the pads
how do you say it b*****d!!
in other news the relay came for the headlamp washers
lets see what all the fuss is about
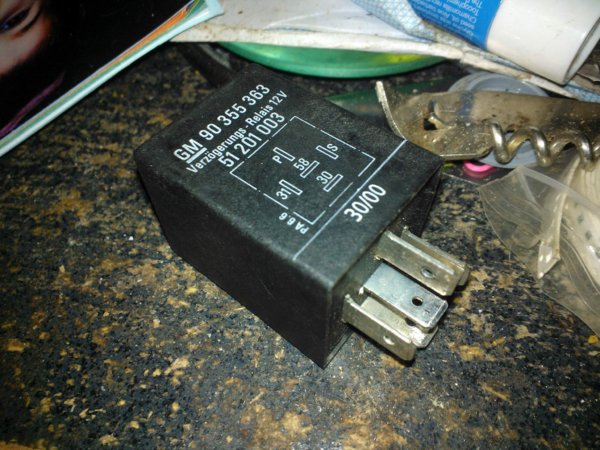
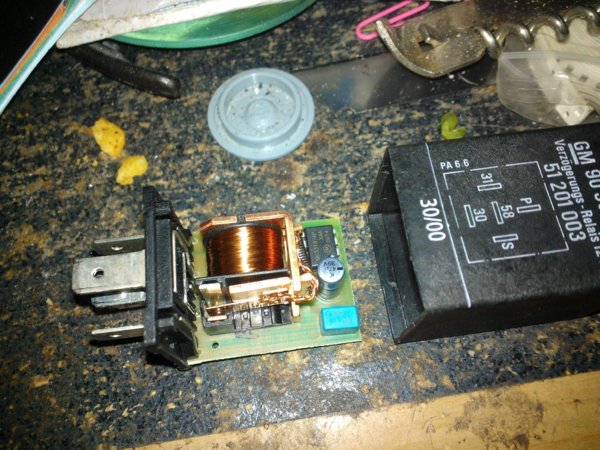
hmmm automotive wash/wipe timer
http://pdf1.alldatasheet.com/datasheet-pdf/view/393592/MOTOROLA/MC33197AP.html
its a PASS with 2 provisos 2 front tires split on the inner tire wall and passenger side ARB drop link has movement in one joint
i then treated myself to a donkey burger and a cuppa

i did notice that one of the rear discs has some scoring lines so went a picked up a set of new pads the ones that came with the discs were cack and i think the caliper is sticking some
but while parking up to get the pads
how do you say it b*****d!!

in other news the relay came for the headlamp washers
lets see what all the fuss is about


hmmm automotive wash/wipe timer
http://pdf1.alldatasheet.com/datasheet-pdf/view/393592/MOTOROLA/MC33197AP.html
Last edited:
the tires i have are fitted with the protective lip but are nonexistent for 215/35/18 on an 8" wheel there stretched on
the only other way is to fit 235/35/18 then id be back to bending all the arches and rubbing the liners again
its easier for me to whip the wheel off and just sand and paint it and cheaper than tires that have a brand
just tested the headlamp washers i now have a self cleaning bonnet
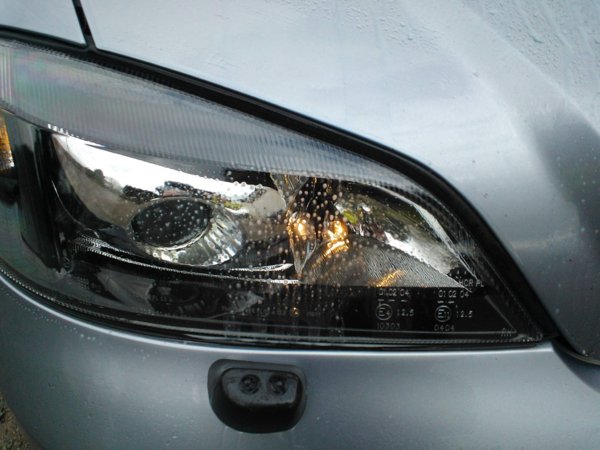
also adjusted the insignia washer jets so there on the screen more and not the roof lol
the only other way is to fit 235/35/18 then id be back to bending all the arches and rubbing the liners again
its easier for me to whip the wheel off and just sand and paint it
just tested the headlamp washers i now have a self cleaning bonnet

also adjusted the insignia washer jets so there on the screen more and not the roof lol
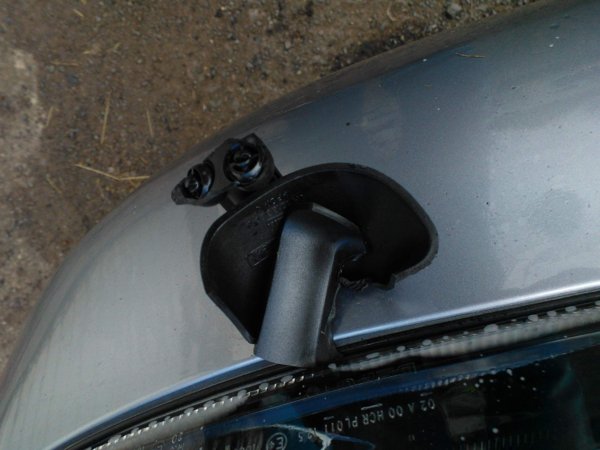
trying to adjust the jet so it was more on the light and not the bonnet was using a plasitc dash cleaning tool with a flat plastic edge pushed it down then pop lolHow'd you manage that?
ive fixed it for now with super glue and plastic welding
it was very niceNowt wrong with a dirty burger, the wheel should be any easy touch up it doesn't look like it has scored the alloy just the paint?
Have you not got new ARB drop links to go on?
yeah your right its just knocked the paint i just put on it off lol
yeah new arb links from matt
yeah our local car parts got ferodo pads @ £19 the ones that autovaux supplied were real corse had thought about changing them for mintex xtreme again as they were good for the 5 years or more they were on
will need to resurface the disc with the das6 and an 80 grit sanding pad
will need to resurface the disc with the das6 and an 80 grit sanding pad
yep i merely said there poo poo and i'd never go back to them after using them in my r19 and having to change them every 6 months due to them wearing out so quick i even went to redstuff but they take way too much heat to get them workingyou were though lol
unless now they have changed the compound and the green stuff are harder ?
Similar threads
- Replies
- 18
- Views
- 13K
Engine / Transmission
Walbro 255 Uprated Fuel Pump Fitting Astra G
- Replies
- 0
- Views
- 2K
